Valley Pan Gasket & End Seals
A good installation of the valley pan gasket, and lower intake will insure you don’t have premature oil and coolant leaks at the back of the engine. The below procedure is one we have developed over time and seems to last the life of the gaskets. These engines are notorious for leaking at the intake, end seals and valve covers as the aluminum is constantly expanding and contracting so the idea here is to get the best possible seal to last the life of the gasket/seals themselves. Others may use a different approach and if it works then great, but premature leaks after installation are more common than we would like to see. Because these type of leaks usually appear at the back of the engine, the oil trail can make its way down the back sides of the engine and pool or rest where the cylinder heads mate to the deck and give the appearance of a leaking head gasket. It is very difficult to determine the origin of these leaks with the engine still in the truck and one might jump to the conclusion that something has failed with the engine when in fact a poor installation of the gaskets is the culprit.
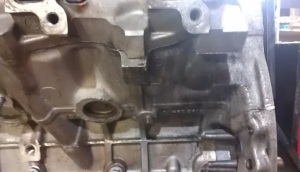
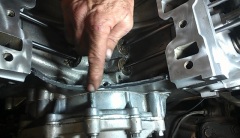
The below images are from a 1500 mile CV8 engine from an ’04 DII and the shop wanted to install new head gaskets. The engine was pulled and as you can, the oil leaks started at the back and made its way all the way around to the boss and head. Because the intake and ends seals would have been replaced during a head gasket replacement, it would be unknown as to which component had originally failed and what repair actually fixed the problem. 

Lets go through the procedure.
1. If you are sealing a used engine, make sure all sealer residue has been removed from the sealing surfaces of the heads, block and lower intake.
2. Apply sealer to the end seal surfaces front and back of the block and spread evening across the surface while also working a dap into the void at the end of each corner.
3. Install the end seals at the front and back and follow up by applying a thin coat of sealer across the surface of the seal and again work a dap into the corners.
4. Apply sealer at the front 2 and rear 2 water jacket ports of the cylinder heads.
5. Carefully lay in the new intake gasket and install by hand the two front and rear bolts for alignment purposes followed by installation of the end seal clamps and snug tight.
6. Apply an even coat of sealer on the intake gasket at the front and rear water jacket ports and install the intake and snug tightly.


